Learn to Sew Series Lesson #2: How to Sew a Zigzag Stitch

Welcome back! I hope you’re loving your sewing journey so far. If your new to sewing you might want to start with our first lesson in the series Lesson #1: Sewing a straight line.
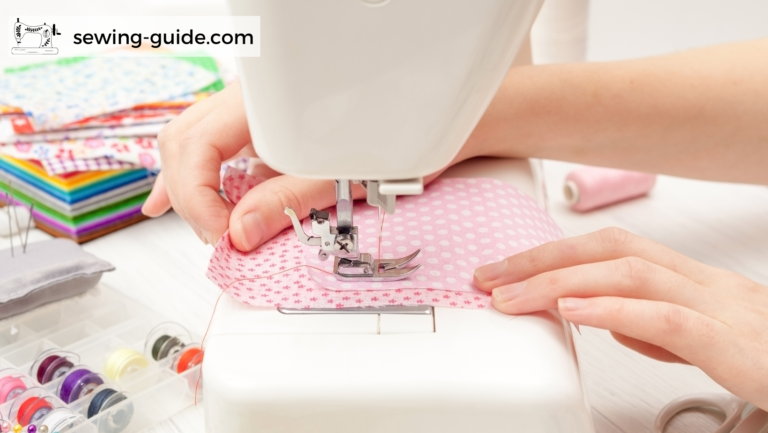
Hopefully, you have mastered sewing in a straight line and had lots of fun making napkins. Now you are ready to move onto the zigzag stitch. This is another fundamental stitch and is the second lesson in our online sewing lessons. Zigzag is a fun stitch to do, and comes in very handy.
So grab a cup of tea (or your preferred beverage) and lets get ready to sew!
What is a Zigzag Stitch?
So let’s start off with what a zigzag stitch actually is and when you might need to use it.
Just as the name suggests a zigzag stitch is just that- a stitch that zigs and zags. It doesn’t sound like much but it’s actually an extremely helpful stitch. There are a few reasons that you might want to use a zigzag stitch. These include:
- To prevent fraying: a zigzag stitch can be used around the edges of your fabric to prevent it from fraying. If you’re sewing clothing or something that you don’t want any raw edges to fray, you can zigzag them first (that’s if you don’t have a serger).
- Embellishment: add interest to your project by using a zigzag stitch as a feature
- Working with stretch fabric: you can use a zigzag stitch when working with stretch fabrics like jersey & knit. Zigzag stich is also a good stitch to use when working with elastic.
- To gather fabric: a zigzag stitch is used when you want to gather fabric. This method of gathering is a little different to traditional methods.
How to Sew a Zigzag Stitch Video
How to Sew a Zigzag Stitch Written Instructions
Just like with our first lesson we are going to use a scrap piece of fabric that doesn’t have any stretch, like cotton.
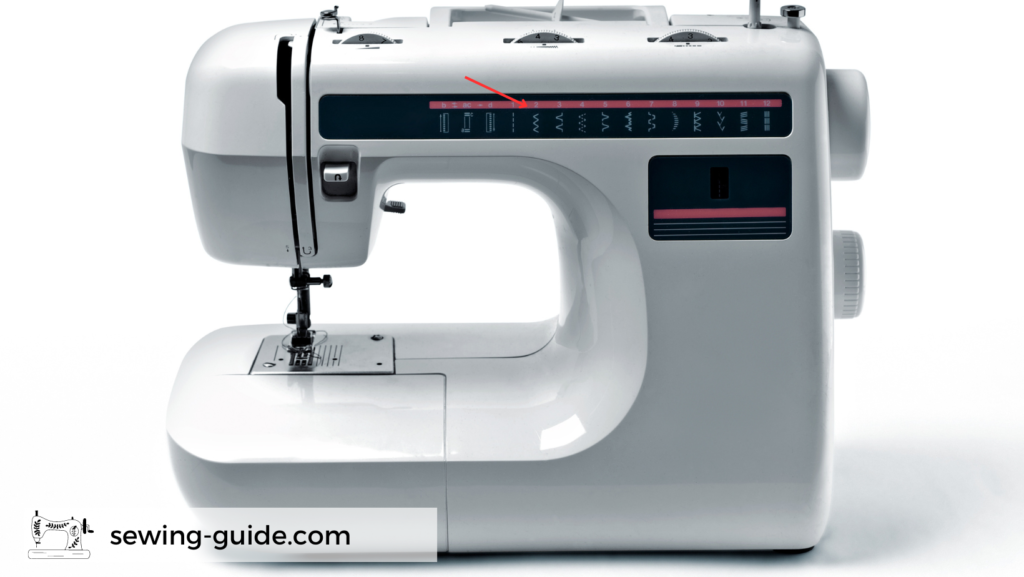
Step One: Set your machine to zigzag
To sew a zigzag stitch first you need to change your stitch setting to zigzag. This setting will be different on each machine but you are looking for the stitch setting that looks like a zigzag. See image below
Step Two: Set your Stitch Length and Width
Next you want to set your stitch width and length. I recommended starting with your sewing machines stitch width at 5.0 and a length of 2.0. This will give you a medium sized zigzag stitch.
Step Three: Lower your Presser Foot & Needle to Start Sewing
Just like before when you sewed a straight line you want to lower your presser foot and then your needle before you start sewing. Slowly press down on your pedal and sew a line of zigzag forwards 1 inch and then backwards 1 inch to make a knot. Then continue sewing forwards down the fabric.
Now that you can see what your zigzag stitch looks like using your normal settings you might like to try adjusting the settings so you can see how the width and length changes your zigzag.
Step 4: Have Fun Testing the Different Settings
Try testing different stitch widths and lengths to see how the different settings affect your zigzag stitch. I would start by just adjusting the length of the stitch first and leaving the width at 5.0 so you can see how the stitch length changes the spacing of your zigzag and then changing the width.
Gathering Using a Zigzag Stitch
Traditionally gathering is done with a straight stitch but some people find it easier to gather using a zigzag stitch so next we are going to learn how to gather using a zigzag.
For difficult fabrics such as tulle and thick fabrics, you can gather by zig zagging over a cord such as yarn or dental floss. Be careful not to catch the cord in your stitching. Here is how it’s done.
Step One: Select the Widest Zigzag Stitch
The first thing you are going to want to do is set your sewing machine to the widest zigzag stitch setting that your machine has. This is important as you don’t want to catch the cord in your zigzag stitch.
Step Two: Place Your Cord Across your Fabric
Next you want to lay your cord, which needs to be as long as the length you are gathering, about a 1/2″ from the raw edge of your fabric (this needs to be the edge you want to gather).
Step Three: Zigzag Stitch Over the Cord
Now you want to zigzag over the cord. Keep going until your reach the end. You’ll see that the zigzag stitches form a sort of casing for the string.
Step Four: Gather your Fabric
Keeping a hold of one end of the cord, gently gather your fabric by moving it along the length of cord. Keep going until you’re done gathering and your gathers are nice and evenly spaced.
And that’s it. You have now learnt how to do a zigzag stitch, as well as how to gather using a zigzag stitch!
Sewing Project: How to Sew a Scrunchie
Scrunchies are a fun project that you can make as gifts for your friends or children. There are a few different methods to make scrunchies but this beginner scrunchie pattern is a great project to combine your straight stitch with your zigzag stitch. In this project you will use your zigzag stitch to sew the elastic ends together. You can follow the tutorial here
Sewing Project: Ruffle Cushion Cover
This is a great sewing project for you to practice using your zigzag gathering stitch to make the ruffles along with your straight stitch to sew a cushion. This is a beginner friendly project no zips required! You can follow the tutorial here